Probing

ncSender includes a built-in probe dialog supporting multiple probe types for automated workpiece zeroing.
Probe Types
3D Probe
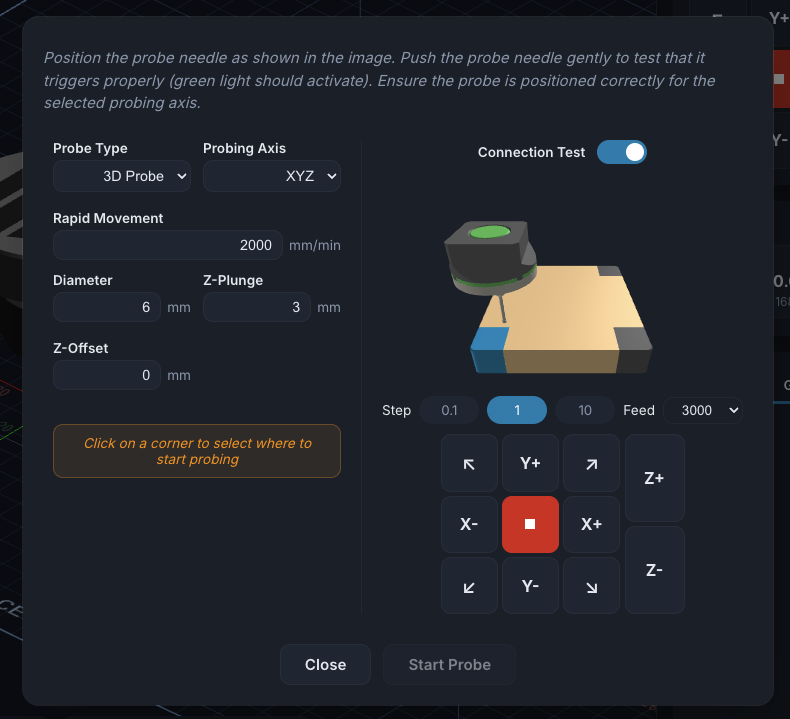
For use with 3D touch probes (ball-point probes).
Supported operations:
- Z only — Surface height probing
- X or Y — Single-axis edge finding
- XY — Two-axis edge finding
- XYZ — Full three-axis auto-zero
- Center Inner — Find the center of a hole or pocket
- Center Outer — Find the center of a cylindrical part
Configuration:
- Ball point diameter
- Z-plunge depth
- Z-offset
- Rapid movement speed

Standard Block
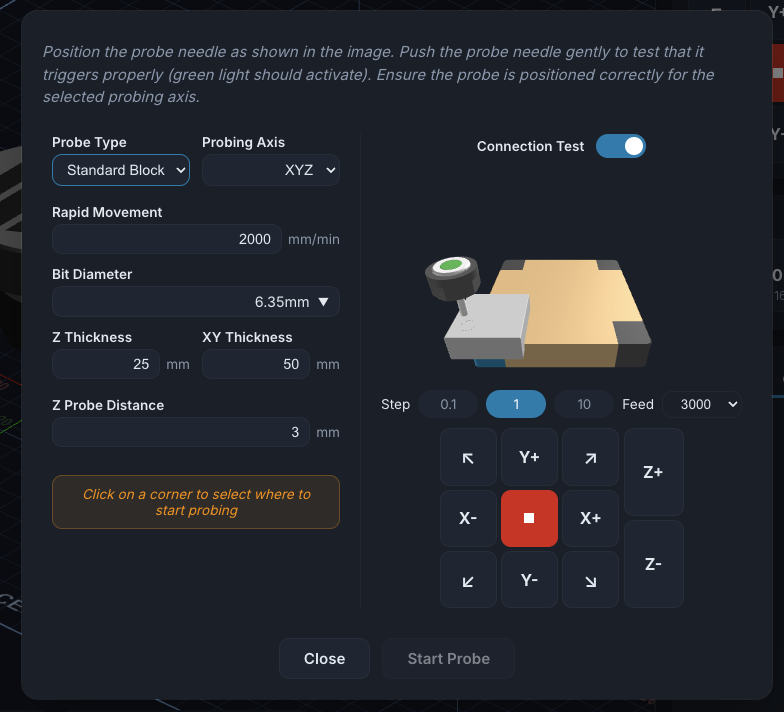
For use with rectangular touch-off blocks (edge finders).
Configuration:
- Bit diameter (multiple presets or custom)
- Z thickness (block height)
- XY thickness
- Z probe distance
AutoZero Touch
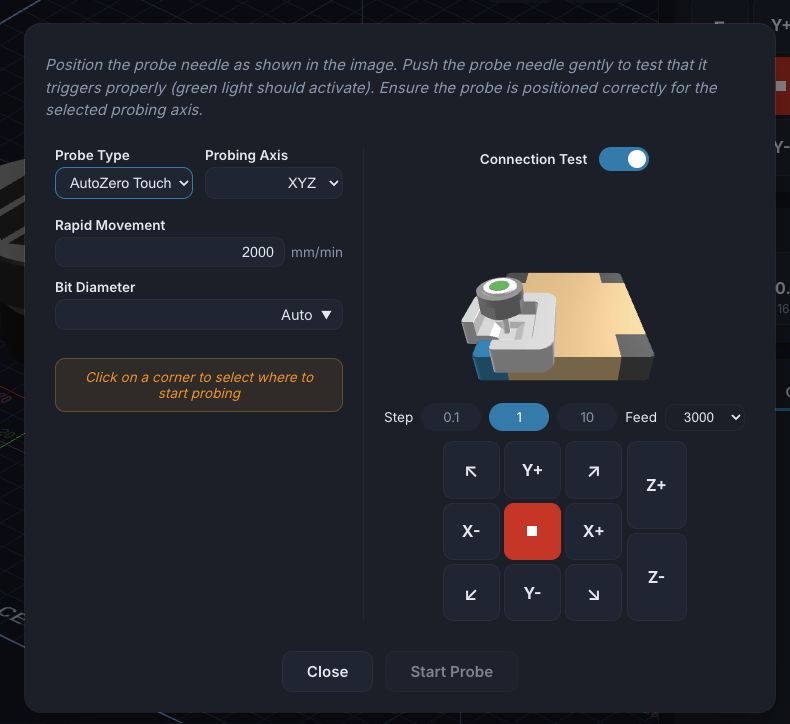
A simplified touch probe that needs almost no setup — pick the probing axis and let it detect the tip. Choose the same probing axes as the 3D probe (Z, X/Y, XY, XYZ).
Configuration:
- Bit diameter: Auto (detected), or a specific value
Using the Probe Dialog
- Open the probe dialog from the toolbar
- Select your probe type
- Configure dimensions and speeds
- Position the probe near the surface/edge
- Click the visual indicator to select which corner/edge to probe
- Click Start Probe
Safety
Always verify your probe configuration before probing. An incorrect Z-plunge depth or feedrate can damage the probe or workpiece.
Probe Status Indicator
The probe dialog shows a real-time indicator:
- Green — Probe is triggered (making contact)
- Gray — Probe is open (no contact)
This helps verify your probe is working before starting a probing cycle.