Pendant
The ncSender Wireless Pendant is a handheld controller for your CNC machine. It gives you a live position readout and hands-on control of jogging, zeroing, homing, and running jobs — right at the machine, without reaching for the keyboard.
It connects to ncSender wirelessly through a small Wireless USB, so you can walk around the machine while you work.
Minimum versions for wireless multi-device support
Running the pendant alongside other wireless accessories on the same Wireless USB requires:
- ncSender — v2.0.63 or newer
- ncSender Pro — v2.0.117 or newer
- Pendant firmware — v1.0.16 or newer (any recent build is fine)
- Wireless USB firmware — v0.2.2 or newer
See Wireless USB below for how to flash a Wireless USB update. If you're on older versions and only use the pendant on its own, no updates are needed.
Hardware
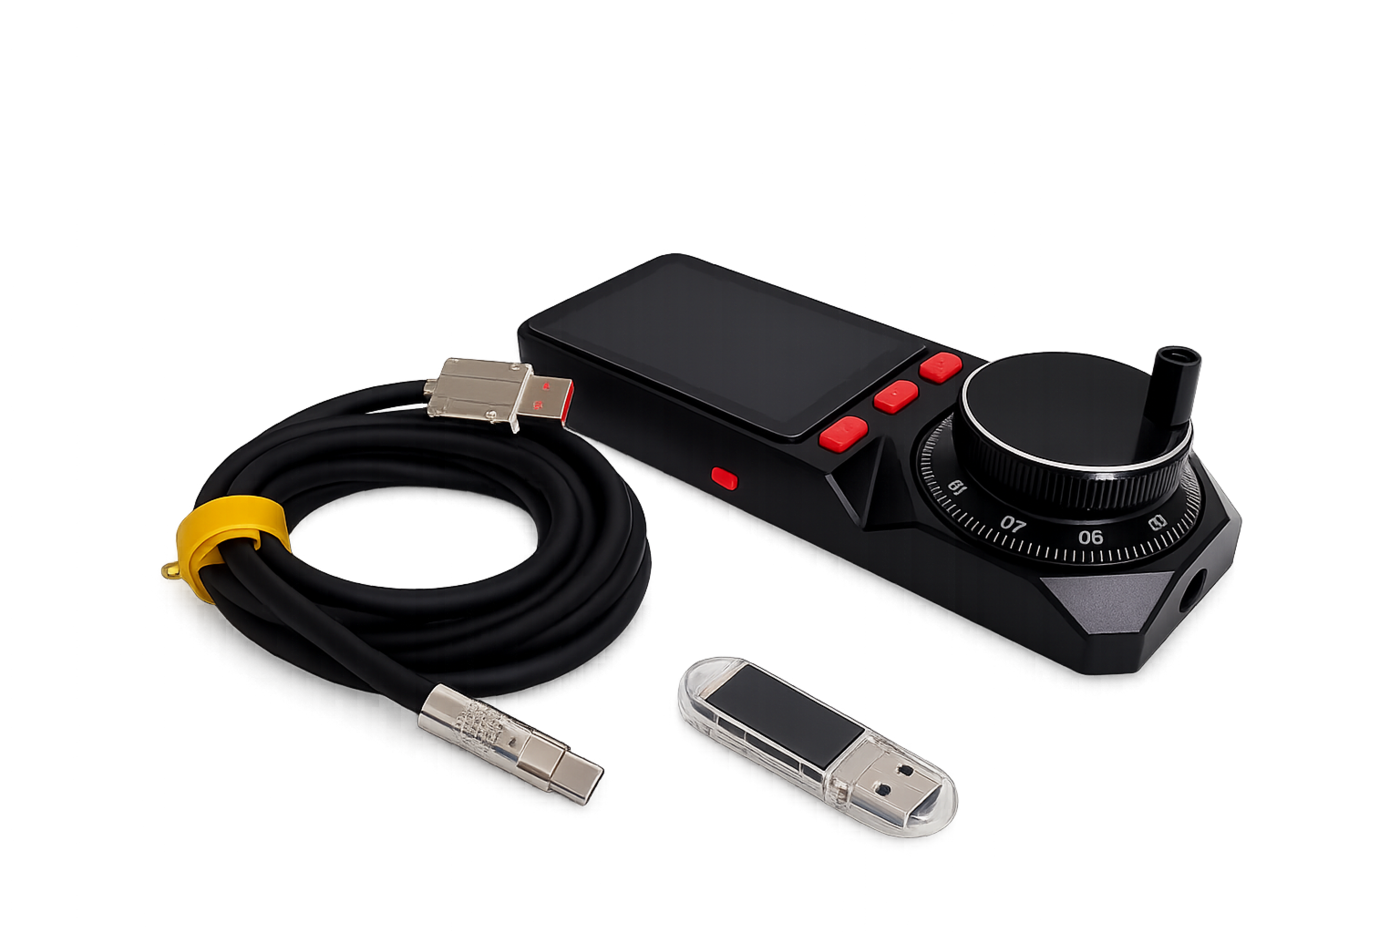
- Pendant — a battery-powered handheld with a touch display, a jog knob (rotary encoder), three soft buttons, and a power button.
- Wireless USB — a small USB stick that plugs into the computer running ncSender and links to the pendant wirelessly.
Getting connected
- Plug the Wireless USB into the computer running ncSender.
- Power on the pendant (hold the power button).
- The pendant and Wireless USB pair automatically and the status bar shows the connection icon.
Once connected, the pendant mirrors your machine state in real time and any button you press acts on the machine immediately.
First-time pairing
If the pendant and Wireless USB have never been paired, open the Setup screen on the pendant and choose Wireless → Scan to pair them. After the first pairing the connection is remembered and reconnects on its own.
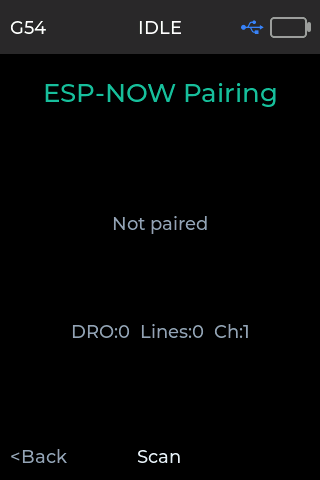
The pairing screen shows whether the pendant is currently paired. Press Scan to search for a Wireless USB; press <Back to return to Setup.
The Jog screen
This is the pendant's home screen — your live readout and jogging controls.
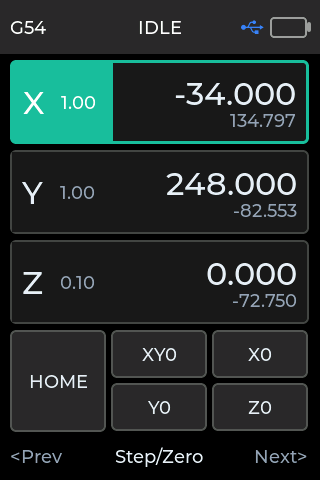
Status bar (top) shows, left to right: the active workspace (e.g. G54),
the machine status (IDLE, RUN, HOLD, ALARM, …), the connection icon,
and the battery level.
Position readout lists each axis (X, Y, Z) with its work position in large
type and the machine position in smaller type underneath. The highlighted axis
is the one the jog knob will move; the small number next to each axis label
(e.g. 1.00) is the current jog step size.
Turn the jog knob to move the selected axis. The step size sets how far each click travels; turning faster moves faster.
Buttons:
- HOME — run the homing cycle.
- XY0 / X0 / Y0 / Z0 — zero the work position for those axes at the current location.
Footer — the three soft buttons below the screen. On the Jog screen they select the axis / step and switch between screens (Prev / Step-Zero / Next).
The Job screen
When you start a program, the pendant automatically switches to the Job screen so the controls you need while cutting are front and center.
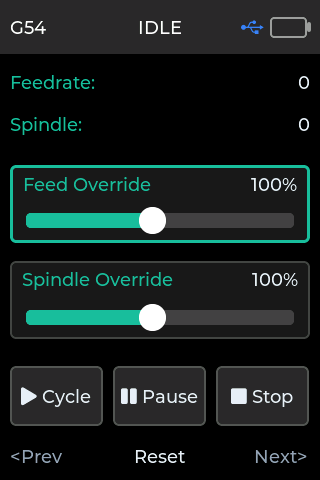
- Feedrate / Spindle (top) — the live feed rate and spindle speed the machine is actually running.
- Feed Override / Spindle Override — turn the jog knob to trim feed rate or spindle speed on the fly. Select which slider to adjust with the footer buttons; each shows the current override percentage.
- Cycle — start / resume the program.
- Pause — feed-hold the running program.
- Stop — stop the program.
When the job finishes or you stop it, the pendant returns to the Jog screen automatically.
The Info screen
The Info screen shows the pendant's current connection type, firmware version, and device name. It's the quickest way to check which firmware you're running — useful before and after a firmware update. Press Setup here to open the Setup screen.
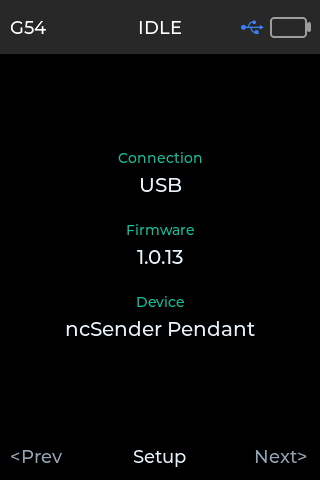
The Setup screen
The Setup screen holds the pendant's own preferences.
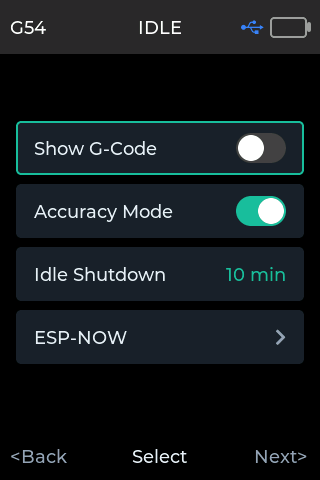
- Show G-Code — when on, jog and command output from the pendant is echoed in ncSender's console. Off keeps the console quiet.
- Accuracy Mode — chooses how the jog knob behaves. On gives precise, step-locked movement; off gives quicker continuous jogging.
- Idle Shutdown — how long the pendant waits, with no activity, before it powers itself off to save battery. Choose from 5 to 30 minutes. Turn the jog knob (or tap the row) to change the value.
- Wireless — pair or unpair with a Wireless USB.
Idle shutdown only runs on battery
While the pendant is plugged into USB (or charging), it stays on indefinitely. The idle timer only starts once it's running on battery, and any touch, button, or knob movement resets it.
Managing the pendant from ncSender
Click the pendant icon in the ncSender toolbar (next to the connection status) to open the Pendant dialog, where you manage the connection and firmware.
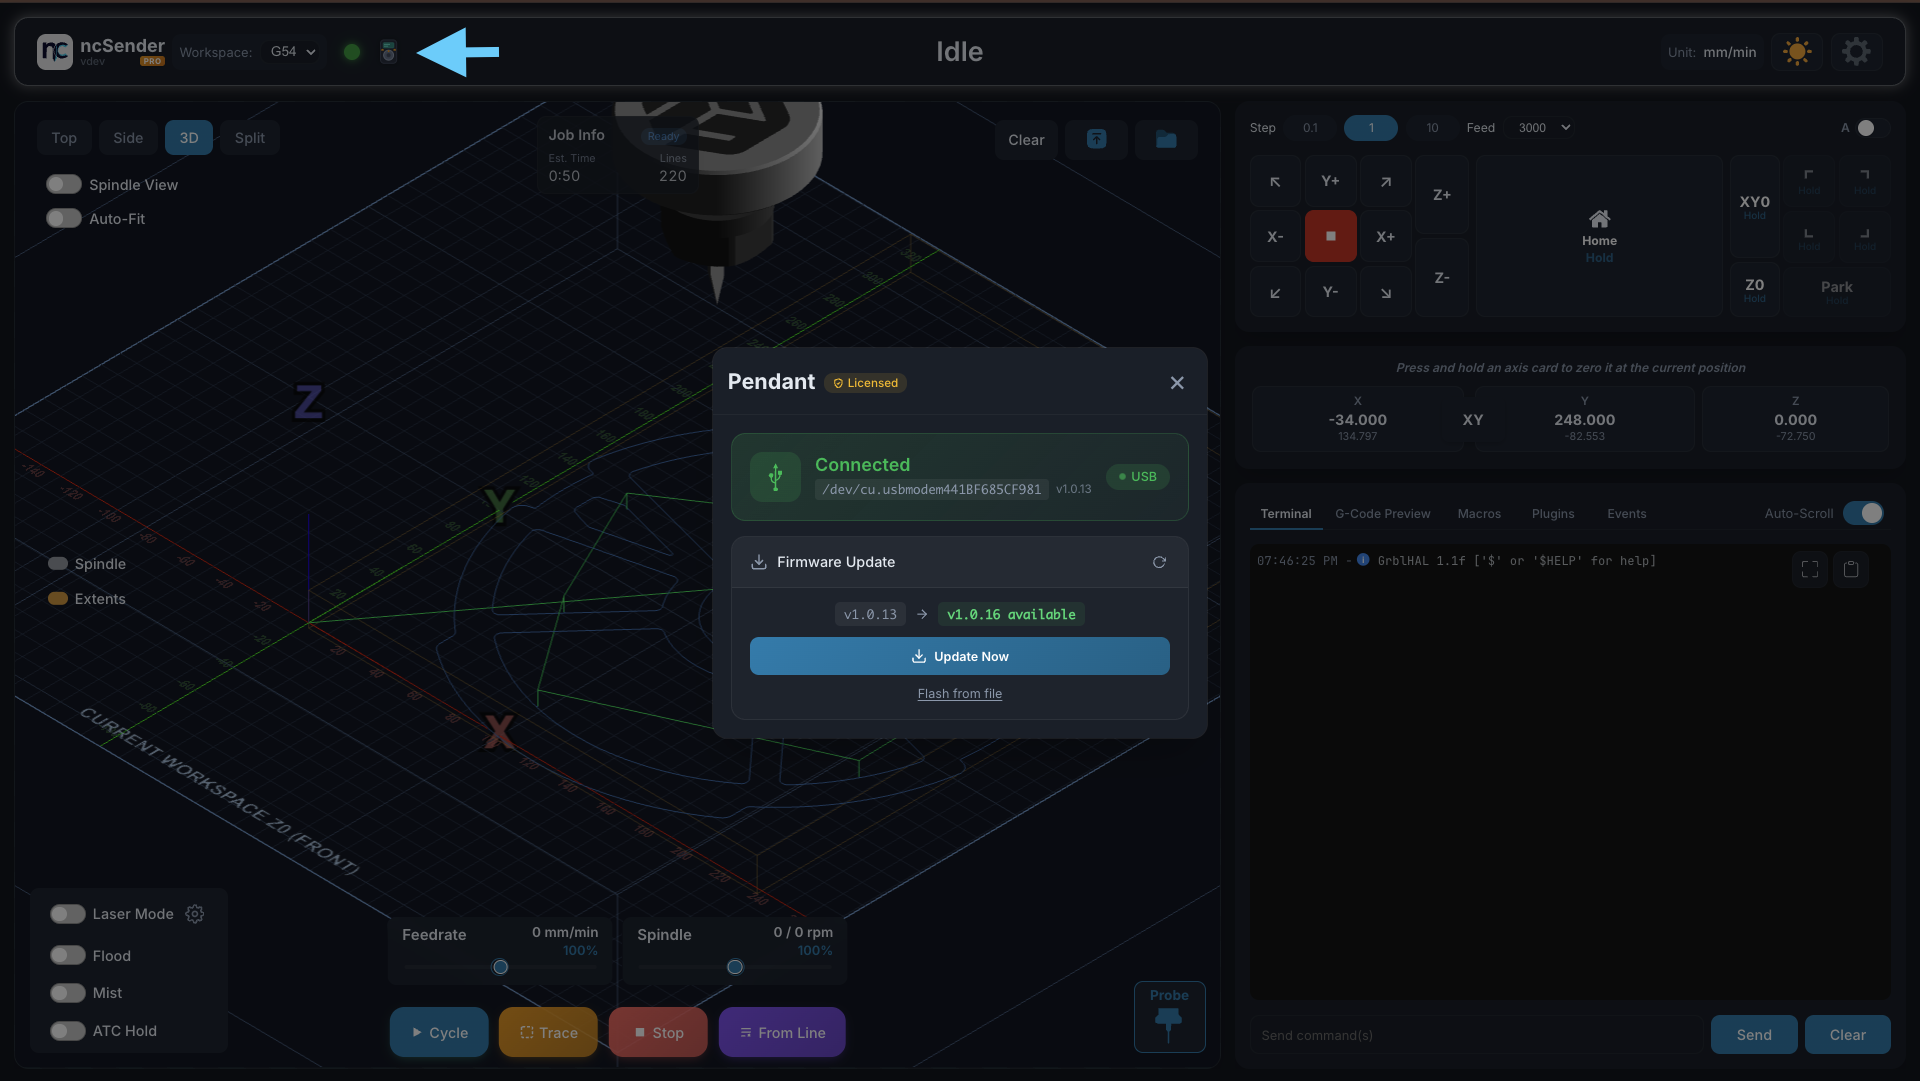
- Connection — shows how the pendant is connected (USB or the Wireless USB), the port, and its current firmware version.
- Firmware Update — ncSender checks for new pendant firmware and shows when
an update is available. Press Update Now to flash it over the existing
connection — no cables or tools required. Flash from file lets you install
a specific firmware
.bininstead.
Wireless USB
The Wireless USB is a small USB-A stick that ncSender uses to talk to the pendant (and other wireless accessories) over the air. Under normal use you never touch it — you plug it in once and forget it. There are two situations where the Wireless USB firmware needs updating.
When to update the Wireless USB firmware:
- You're enabling wireless multi-device support — running the pendant alongside other accessories (AutoDustBoot, Smart RGB LED) on the same Wireless USB. Multi-device support requires Wireless USB firmware v0.2.2 or newer; older firmware only supports a single paired pendant.
- A newer firmware fixes an issue you're hitting — pairing failures, intermittent disconnects, LCD glitches, etc.
How to update:
Unlike the pendant, the Wireless USB does not update through ncSender's Pendant dialog. Use the browser-based flasher below (Google Chrome or Microsoft Edge required — it uses the Web Serial API):
Open the Wireless USB Flasher →
The flasher lists the available firmware versions — pick one, then follow the on-screen Boot Mode Instructions (hold the small BOOT button on the Wireless USB while plugging it in), click Connect, then Flash firmware. When it finishes, unplug and replug the Wireless USB. The new version shows on its LCD at power-on.
Checking the Wireless USB firmware version
The Wireless USB prints its firmware version on its own LCD at power-on
(v0.2.2, v0.2.2, …). You can also see it in ncSender's Pendant
dialog under Connection.
Compatibility
A pendant and a Wireless USB running mismatched firmware major versions may fail to pair. If you update the Wireless USB to v0.2.x, make sure the pendant is on v1.0.16 or newer as well.